The focus of this post however is a Casio Cassiopeia E-115, I remember when it came out and it "was all the rage". I think devices like this foreshadowed the enormous smartphone market of today; cell phones were still rather basic machines then and remained so for a while. Anyway I found this and was unable to power it up (it's been sitting dormant for over 10 years) even with AC power. This was really personally frustrating and researching it online didn't fill me with a lot of hope. Alas, when it finally booted up for me I was overjoyed, and it turned out to be a hilariously simple solution (but I still have some further investigating to do).
Materials need for this tutorial:
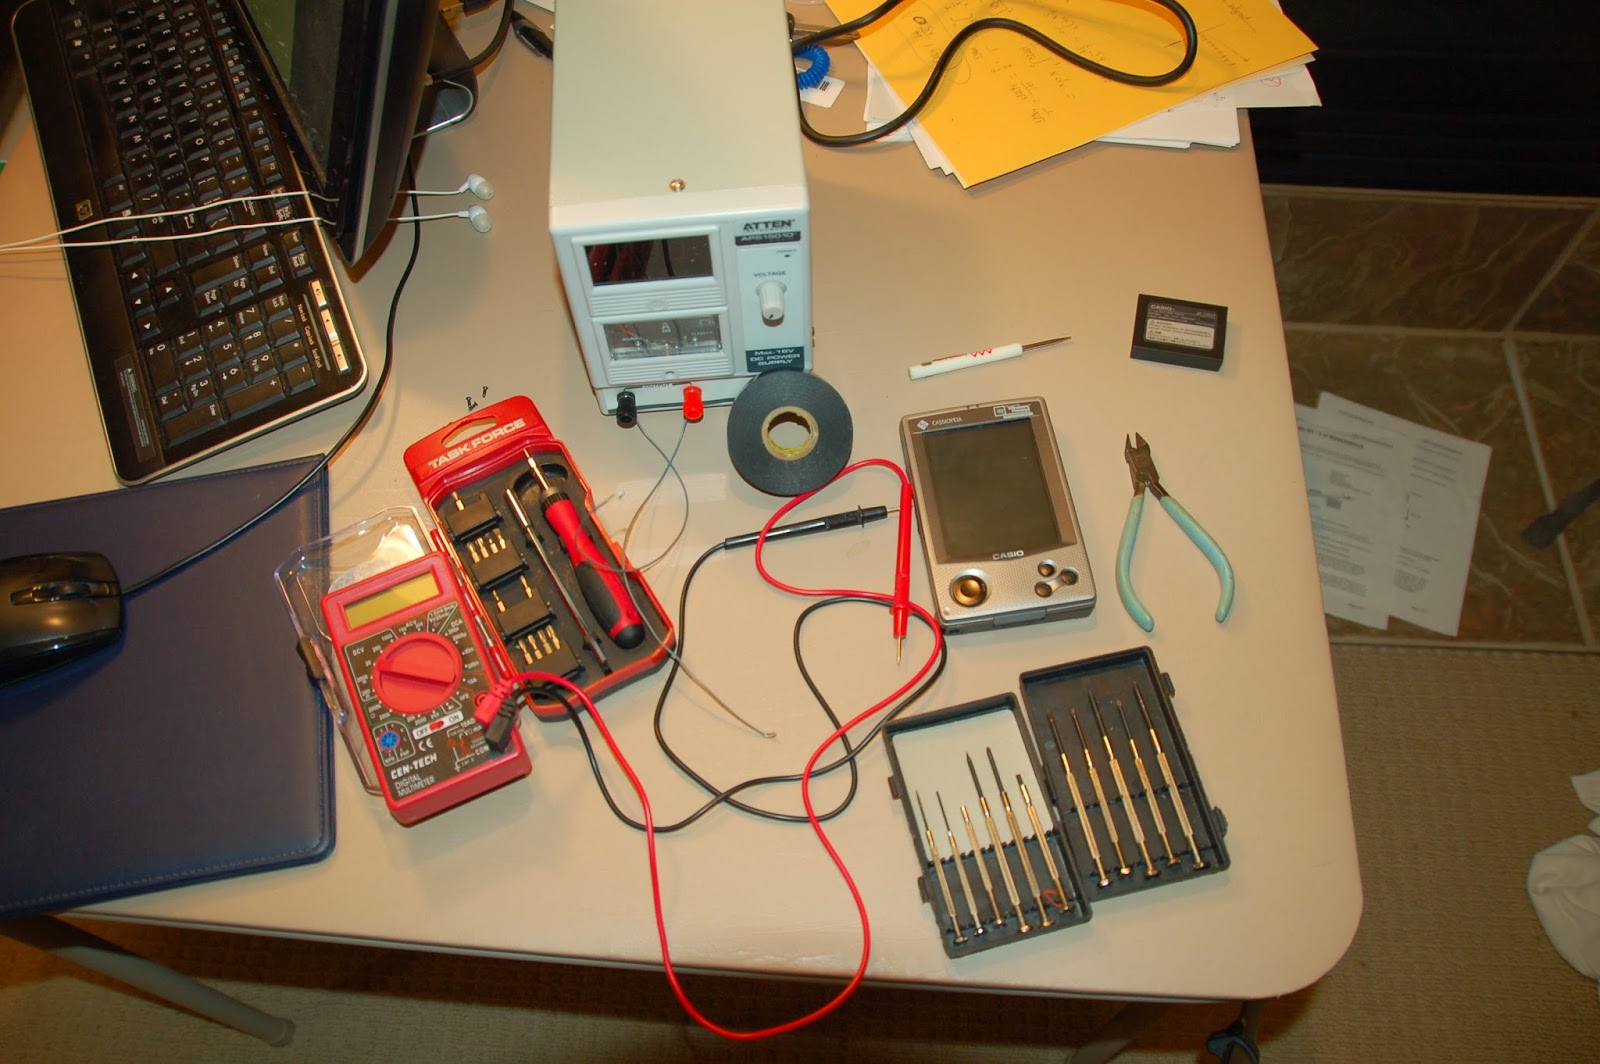
--Multimeter
--Electrical tape
--Spare wire
--Wire cutters
--Small screw drivers
--Digital power supply
--Cassiopeia E-115 with battery and AC power unit
1) You have a Cassiopeia E-115 (or any of the E-100's series and possibly others), but it will not turn on (which is a common problem that develops). First problem to look into is power. Get out a multimeter. Now switch it to 20 V DC (straight line with dots), it's all you need here. First, check inside the main battery area, with the battery charging. When flipped over, the right side is negative, the middle is "T" for thermistor, and the left is the positive contact. If you're wondering what the thermistor is, check out the links I list below. Battery packs are becoming smarter and modern battery packs will even have a microprocessor (!) checking temperature and battery life constantly.


2) Cover the "+" contact on the battery with electrical tape and put the battery in. This is to ensure the connection of the internal thermistor across the "T" and "-" contacts. If it now turns on, then a bad battery is a likely culprit. If it still doesn't turn on, then a bad charging circuit may be the problem (which is the worst as I don't know currently where it is or how to replace it in a "DIY" way). However, it may not be that so don't give up yet. Now we will begin opening up the device (let the fun begin!).


Pretty board, isn't it? Now next thing to check , which I find silly, is the microswitch between the main and back-up battery. Apparently some people were able to get the device to turn on after flipping the switch a few times. I'm not 100% what they were talking about but there's a small white switch right above the main battery pack area and you can also move the actually switch on the outside back cover too. This didn't do anything for me. Also there a rather large capacitor near where you plug in AC power on bottom right, use you mulitimeter to see it you get any voltage (I got 5.2 V, which meant there's power coming in, and there's a problem on the board somewhere). If that silly trick didn't work, go to step 4.
4) Now we're going to go deeper. Someone online was able to get his Cassiopeia to boot up by cleaning the ROM-board contacts. The ROM board is a small ~1.2 X 1.2 inch board screwed in to the back PCB. Now, be careful (!) as the manufacturers put some light glue on the screws. It's very easy to wear away the threads of the screw. I actually did that for one screw, and was able to use a dremel tool to grind away the screw and pull the board up; but I would try to avoid that. Scrap away some of the glue around the edges of the screw, being careful not to hit any of the PCB leads. Now pull off the chip; it's the ROM board! This is the part of this computer that never changes on any boot up. Use a tiny clothe stick and some contact cleaner to ensure good contact, put back on and try to boot up again. If you have the same predicament as me, it still wouldn't boot up! On to step 5.

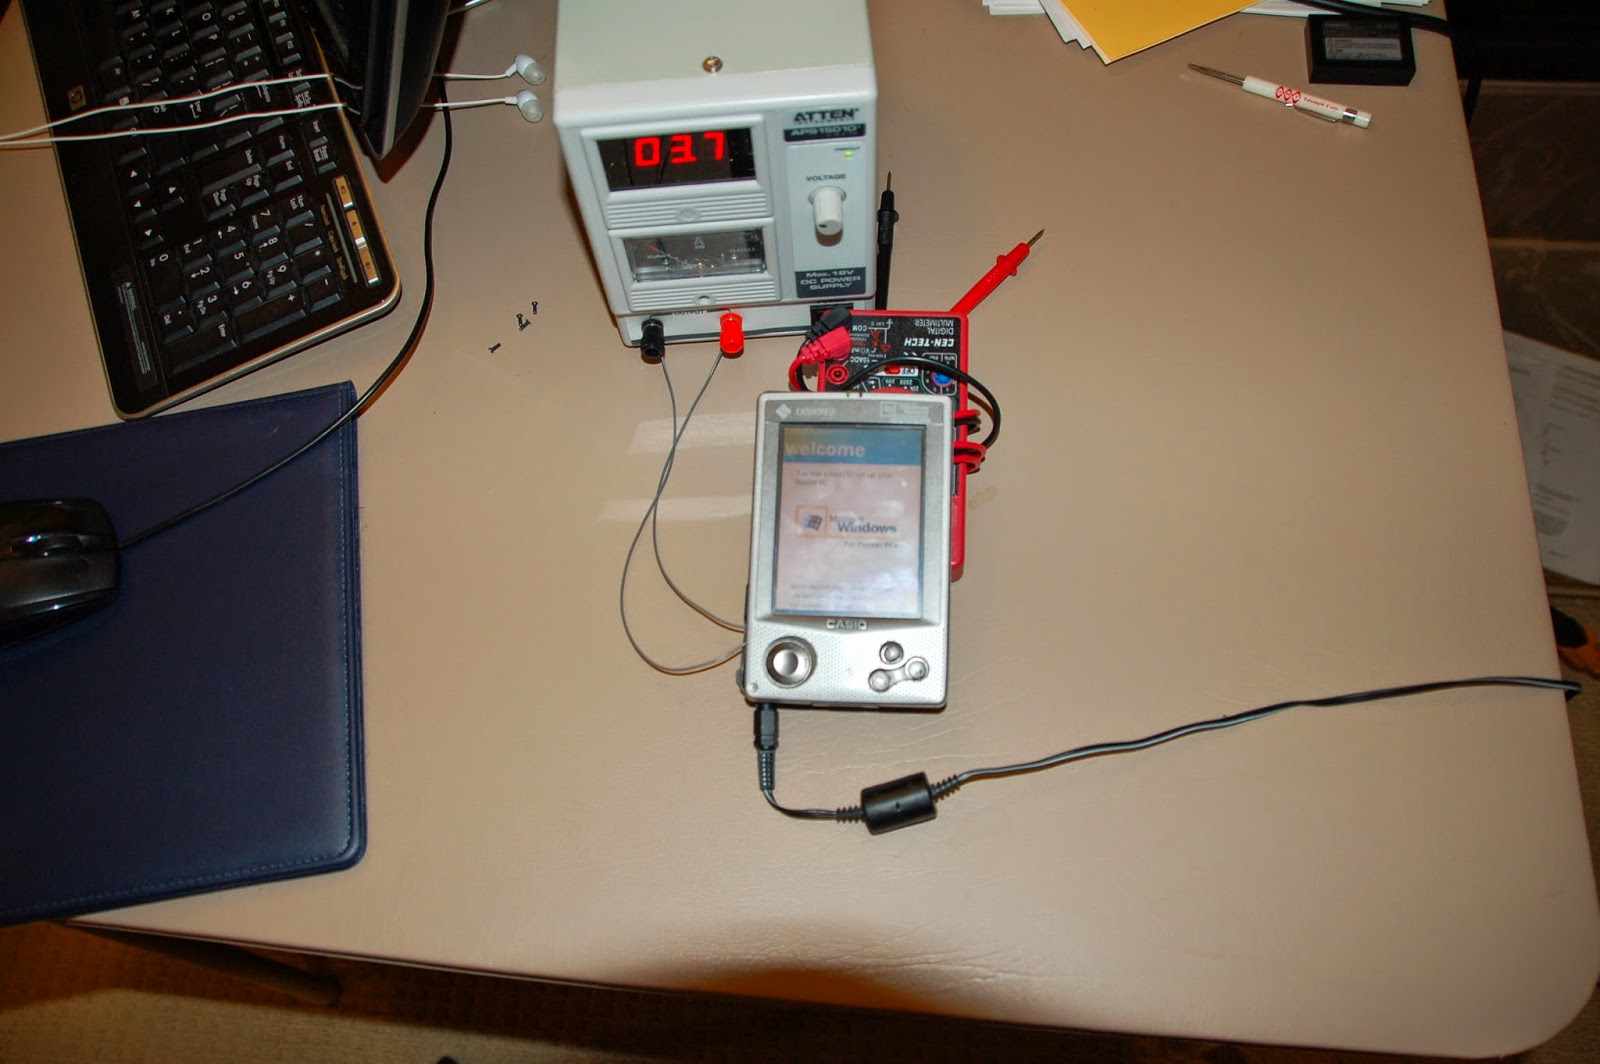
5) Ok, so we've exhausted a lot of options, basically all the ones I've seen online. If your device still won't boot after this then I'm not sure right now what the problem is. Also, a bad hardware component or entire circuit will be very difficult to pin down and fix; you may have to resort to another electronic repair place or Casio support. Now, get ready to laugh at how easy my solution was (to at least get a power-up). As I did in a previous tutorial, I widdled the plastic off some wires on both ends and connected them to my digital power supply and wrapped them around the positive and negative leads in the main battery area (make sure "+" to "+" and "-" to "-"). I set the digital power supply to 3.7 V (the amount on the battery) and had AC power plugged in. And...IT FINALLY BOOTED UP! :)

I was able to play some Solitaire and explore the device I had forgotten about. Next up, I would really like to get Linux running on it, but there's not much out there, so that's an iffy prospect. Now I need to investigate where the charge circuit is and get my Cassiopeia running with pure battery power. As always, feel free to ask questions, I'll do my best to answer any.
Research Links:
--en.wikipedia.org/wiki/Thermistor
--electronics.stackexchange.com/questions/10588/why-are-there-3-pins-on-some-batteries
--www.youtube.com/watch?v=l0TT5CnbwBQ
--pdadb.net/index.php?m=specs&id=11&view=1&c=casio_cassiopeia_e-115
--www.amorphix.net/cid=256
--forums.enterprisemobiletoday.com/showthread.php?12701-E115-power-problem